How to Care for Clematis: Complete Guide for Spectacular Blooming

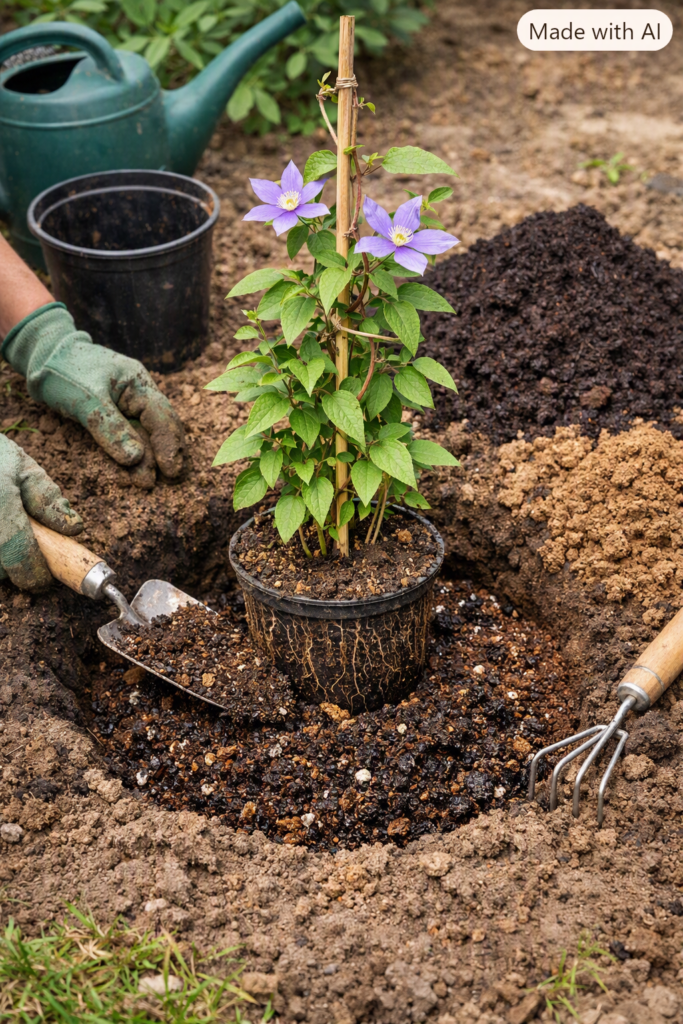
By Ana Gutiérrez – VerdeVivo Garden Studio
"A well-cared-for climbing plant can transform an ordinary wall into a natural masterpiece. I've learned that with clematis, success lies in the details."
Introduction
When I first discovered clematis, I was captivated by its versatility. It can cover pergolas, climb walls, and complement rose gardens beautifully. However, it can also feel intimidating to gardeners who are unfamiliar with its care requirements.
After more than a decade advising Mediterranean gardens, I have seen both successes and failures. That's why I want to provide a practical and easy-to-follow guide to help your clematis thrive, bloom abundantly, and reward you with beauty while requiring less effort.
1. Understanding Clematis: The Essentials
Before getting started, it helps to understand a little about its biology:
- Origin and Types: There are many species and hybrids of clematis. Some prefer temperate climates, while others tolerate heat or cold better.
- Growth Habit: A climbing plant that requires support such as a trellis, arbor, or stake.
- Basic Requirements:
- Full sun to partial shade.
- Cool, shaded roots.
- Well-draining soil.
- Rich, fertile soil containing organic matter.
Understanding these fundamentals makes it easier to adjust watering, pruning, and pest management.
2. Planting and Ideal Location
2.1 Choosing the Right Spot
The secret to success is simple: keep the roots cool and the foliage in the light. The base of the plant should remain shaded, while the upper growth receives plenty of sunlight.
2.2 Soil Preparation
I recommend:
- Digging a planting hole approximately 20 × 20 × 20 inches (50 × 50 × 50 cm).
- Mixing native soil with compost, worm castings, peat moss, or other organic matter.
- Adding coarse sand if drainage needs improvement.
- Placing gravel at the bottom if the soil is especially compacted.
If planting from a nursery container, gently loosen the roots and position the plant so that the stem-root junction is level with the soil surface, or slightly below it in very hot climates.
2.3 Planting
- Water thoroughly before planting.
- Place the plant in position and backfill the hole.
- Firm the soil gently.
- Water again until the soil is evenly moist but not waterlogged.
3. Watering: Frequency, Quantity, and Practical Tips
One of the most common mistakes is shallow watering. Clematis benefits from deep watering sessions rather than frequent, light watering.
- Growing Season: 2 to 3 waterings per week, depending on climate.
- Quantity: Deep, thorough watering is preferable.
- Avoid Waterlogging: Improve drainage if water remains stagnant.
- Mulching: Apply organic mulch around the base to conserve moisture and regulate soil temperature.
- Extreme Summer Heat: Daily watering may be necessary during particularly hot, dry conditions, while ensuring proper soil aeration.
4. Fertilizing: When and How Much
Proper fertilization plays a crucial role in achieving abundant blooms.
- Recommended Times: Early spring before new growth and after flowering.
- Fertilizer Type: Balanced fertilizer such as NPK 10-10-10 or one slightly higher in potassium.
- Organic Options: Compost or well-aged worm castings.
- Application Rate: Follow the manufacturer's instructions.
- Frequency: Every 6 to 8 weeks during active growth unless using slow-release organic amendments.
5. Clematis Pruning: Know Your Group
Proper pruning depends on the clematis group to which your plant belongs.
| Group | Pruning Time | Pruning Method |
|---|---|---|
| Group I (Early Blooming) | After flowering | Remove dead and spent flowering stems. |
| Group II (Spring and Fall Blooming) | Late winter | Light pruning, removing about one-third of growth. |
| Group III (Late Blooming) | Winter | Cut back most stems, leaving 2 to 3 healthy buds on strong stems. |
Pro Tip: Mark flowering stems with colored ribbons during the season. This makes identifying what to prune much easier the following year.
6. Protection Against Weather and Pests
6.1 Weather Protection
- Apply a thick mulch layer during cold winters to protect the root system.
- Provide afternoon shade if leaves show signs of scorching during extreme heat.
6.2 Common Pests and Treatments
- Aphids: Remove with a gentle stream of water or insecticidal soap.
- Powdery Mildew: Improve air circulation and avoid wetting foliage.
- Scale Insects: Treat with horticultural oil or insecticidal soap.
- Clematis Wilt (Fusarium): Often associated with excessive moisture. Improve drainage and reduce watering.
Regular inspection of leaves, especially the undersides, is one of the best preventive measures.
7. Annual Care Calendar
| Season | Main Tasks |
|---|---|
| Spring | Planting, fertilizing, and regular watering. |
| Summer | Deep watering and partial shade during heat waves. |
| Fall | Reduce watering and prepare for dormancy. |
| Winter | Pruning, root protection, and pest inspection. |
8. Common Mistakes and How to Avoid Them
- Planting in intense full sun all day, which can burn foliage.
- Frequent shallow watering, resulting in weak roots.
- Incorrect pruning based on the wrong clematis group.
- Overusing nitrogen fertilizer, producing leaves instead of flowers.
- Ignoring minor pest infestations until they become serious problems.
9. Real-Life Experience
I once worked with a client who planted a clematis against a south-facing wall. Every summer the plant lost leaves and flowers.
After investigation, we discovered that the root zone was receiving intense direct sunlight and overheating. We corrected the problem by adding a support structure, providing light shade, and applying a deep layer of mulch.
The following year the plant grew vigorously and produced abundant blooms. Small adjustments like these often make the difference between success and failure.